Tuesday, February 23, 2016

Baby Sunflower Head Wrap: a simpler cure for baby fever than having an actual baby

 
Sunflower baby head wrap, made from fleece and felt.

So, my friends had a baby, and she is really cute. Her name is Harper.
I was like, Dude, I WANT ONE OF THOSE TOO. But, like, I still have a couple years of this dang PhD left, so I should probably hold off for now. In the meantime, I consoled myself by making a head wrap for this existing baby. 
Harper (someone else's baby), wearing  the sunflower head wrap I made.
One day, I saw this classmate of mine (an adult) wearing a fleece head wrap with a flower on it. She told me her sister had made it for her, so I decided I would make one for this baby. Here is the tutorial (from Delia Creates) that my classmate's sister used to make an adult "ear warmer":
http://www.deliacreates.com/ear-warmerssimplified-tutorial/

I changed a few things and invented my own flower embellishment, so I will talk about those modifications. 

YOU WILL NEED:
-1/4 yard fleece for the head wrap
-Coordinating thread for the head wrap
-Two shades of gold/yellow felt and/or fleece for the sunflower petals (1/4 yard of fleece is plenty, or 2 sheets of felt will do)
-Coordinating thread for the petals
-One sheet of brown felt for sunflower center
-Hot glue
-Barrette back
-2" fold-over elastic
-A 0-6-month-old baby to wear the head wrap.
Probably a girl, if you make a sunflower one, because the patriarchy mostly forbids little boys from wearing stuff with flowers. But hey, the revolution's gotta start somewhere.


How to make the sunflower

The sunflower is made from both felt (the inner petals and the brown center) and fleece (the outer petals). Either material will work; I ended up with felt and fleece so I could get the slight variation in the gold color of the petals.

I kinda based the technique of making the petals on this tutorial for making a felt dahlia: http://www.notmartha.org/tomake/to-make-diy-mothers-day-corsage-felt-dahlia-flower-brooch/

I started by creating these two cardboard templates: one for the outer and one for the inner petals. 


Then I cut the small petals out of the yellow felt, and the larger petals out of the gold fleece.


I chose to sew my petals together at the base. 

Personally, I think people overuse glue guns for crafting.

Admittedly, I learned to sew from my mom, who is from the old school. I think she kinda feels like glue guns are cheating, while hand sewing is the true craftsmanship. I have to agree with her. 
Also, I find it more fun to hand sew things while, like, watching American Horror Story. Granted, if I had an actual baby, I might be more pressed for time. But I don't even have a plant, just a dissertation. So.

I primarily chose to sew instead of glue the bases of the petals because, when I've used hot glue on felt or fabric flowers in the past, I find that it tends to get on the petals, and has the potential to ruin the appearance of the flower.


Make like this many petals.
I think I may have had to make more once I started to assemble the flower. Nbd. 
Ok, but I did use hot glue to secure the petals to a circular felt base (visible in a photo below). You could sew them on, too, but I have indeed found that flowers held together with only thread tend to come apart more easily, at least when I make them. Glue can provide some useful stability, so long as you apply it somewhere that it doesn't become visible and ruin your project.

Secure the larger, outer petals to a circular felt base. Secure them also to one another, in the center.

Secure the smaller, inner petals to the outer petals, and also to one another in the center.

The center of my sunflower is made from brown felt. I based the technique off one of the first felt flower tutorials I ever followed, the "looped mum" from the Crafted Sparrow:
 http://www.thecraftedsparrow.com/2012/04/felt-flowers-tutorials-5-to-choose-from.html

You start with a strip of brown felt. Idk how long it was, like probably just the width of the felt sheet. The strip was probably about 2" wide, but again, idk. Just use your best judgment; it's not, like, an exact science.

(there is no reason the edge is pinked, it just is)
Fold the strip in half and sew along the edge. Again, you could glue this, but I prefer sewing in order to avoid getting glue where you don't want it.


 Now cut some slits in the folded edge of the strip.


Roll it up and sew it together. I guess you can glue if you want, but sewing all this is really not a big deal, so you shouldn't be afraid of it.


I chose to attach the flower to a barrette, rather than directly to the head wrap.

This is for two reasons:
1) the flower can't go in the wash because of the felt and the hot glue. But, like, I hear babies puke and what not, so if bodily fluids somehow get on Harper's head wrap, her parents can still wash it.

2) I hear babies grow real fast, so next year Harper might not even be able to wear this accessory. But she can potentially wear the barrette if she wants, or her parents can clip it onto something else like a bag, an item of clothing, a decoration in the house, whatever.

The barrette is just clipped through a couple slits in the fleece of the head wrap. You could do button holes with your sewing machine if you were concerned about fraying.

Back of the sunflower, which is actually a barrette.
Also, JAMBERRY NAILS!!

Head wrap inspired by Delia Creates: Baby version

So I looked at the template from Delia Creates and changed the sizing for an infant. Since I don't have an actual infant around here to measure, I just consulted the Internet about sizing for baby headbands. According to the chart in this adorable tutorial, a recommended headband size for a 0-6-month-old is 13":
http://scrapbooks-etc.com/2013/10/29/tutorial-tuesday-paper-floral-headpieces/

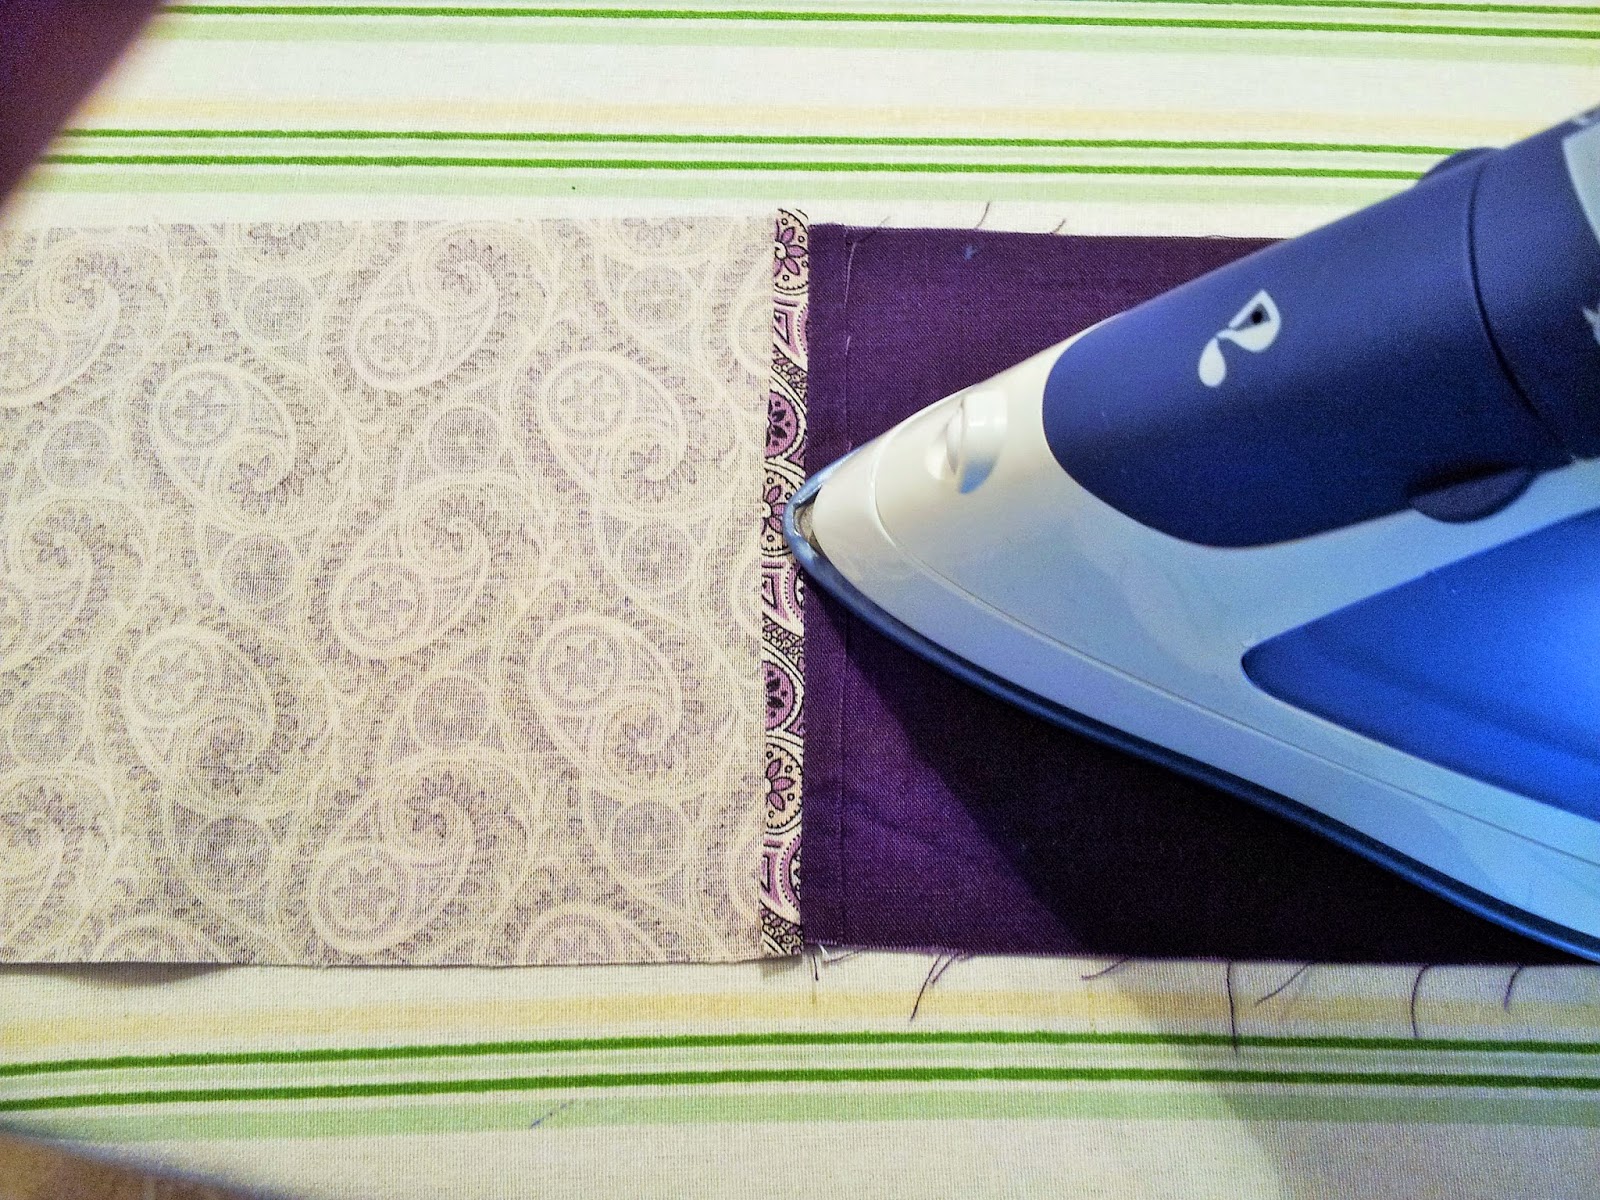
Because I planned to make a head wrap that attaches with elastic rather than a button (like the original Delia Creates model), I decided the fleece piece itself should be about 12" long. The cardboard template is for half the head wrap.


BUT I had a problem when I tried to make the headband out of a piece of fleece this exact size.
There was not enough seam allowance, so the fleece got all scrunchy when I tried to sew down the edges. Fleece, tbh, is not all that easy to work with. Especially if it has a fair amount of stretch, as this type did (from Hobby Lobby).

This, NO. Seam allowances not wide enough.
So I tried again and cut a piece with an enormous seam allowance:


Yes, Dude, I know what this looks like. IT'S WHERE BABIES COME FROM.
I am also a master feminist so I will not apologize for this allusion to vaginas. Ok?
But yeah so fold the edges over generously, pin, and then cut like a 2.5" piece of fold-over elastic.


Set the fold-over elastic RS to WS of the fleece. Pretty much you will fold the fleece over and catch the elastic with the zig-zag stitch you will run around the entire head wrap.


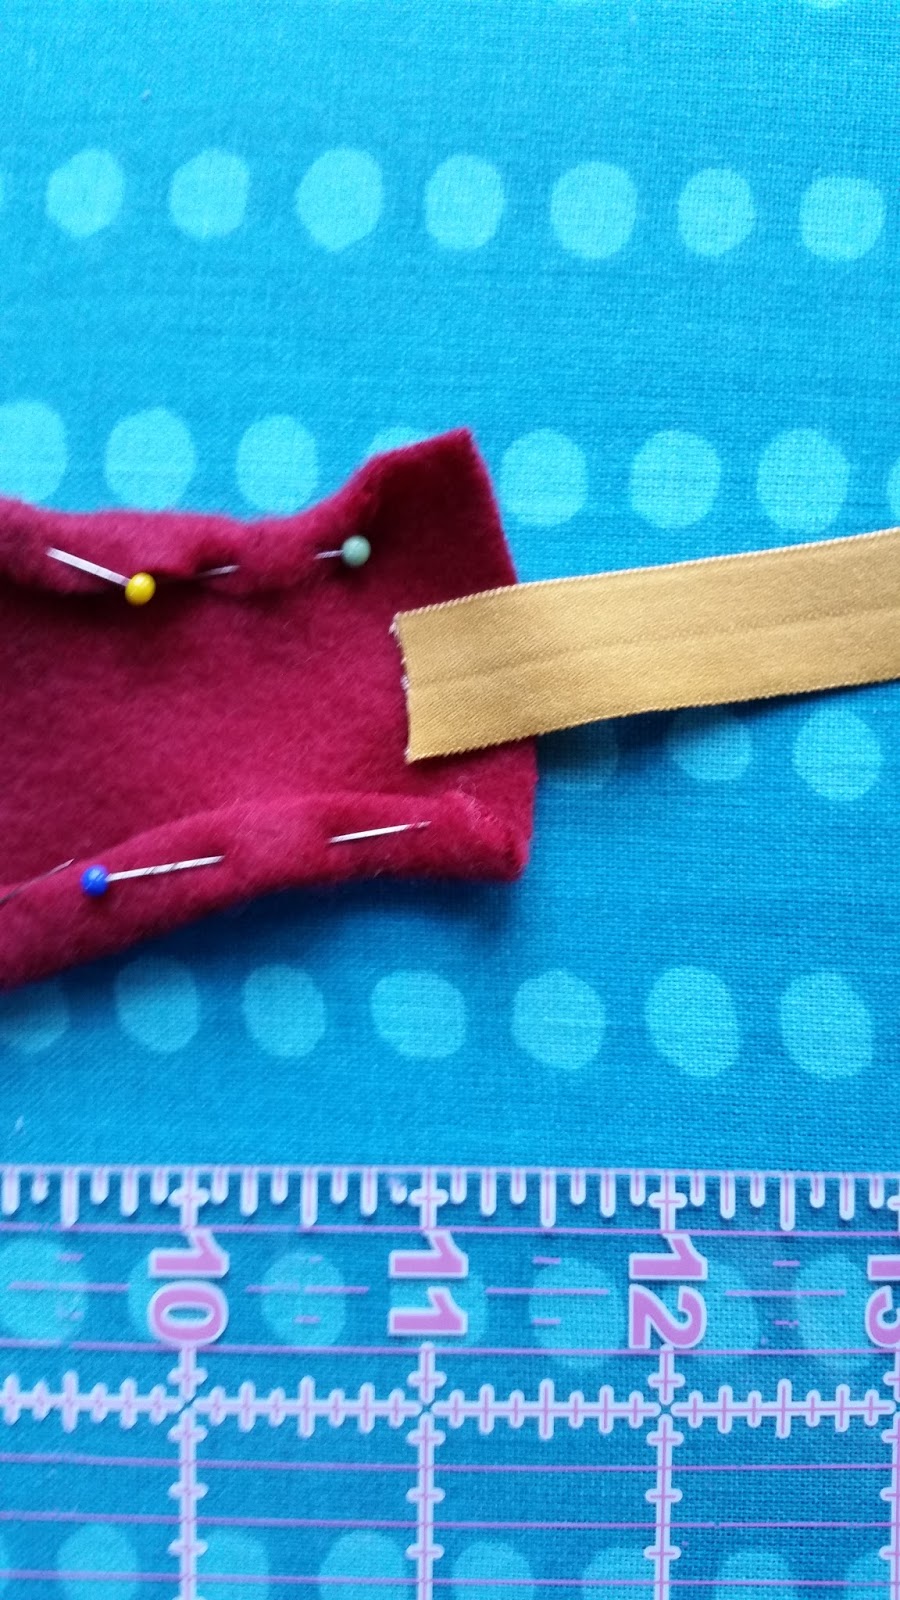
That is basically it. The zig zag stitch was key, at least for the fleece I was working with, because of the stretch. I ran a double line of it over the edges where the elastic was attached.


Hopefully I will one day finish this eternal degree and maybe have a kid of my own to make stuff for.

Of course, if I had an actual baby, I realize I would also have less time to make stuff, and definitely less time to write in this blog...

...but still. As I say, I am a master feminist, so I believe I have the right to do both, while simultaneously applying the relevant theoretical frameworks.

Friday, November 27, 2015

Camo: A skirt, even if you lack a truck and/or knowledge about hunting


So every summer, this Catholic church in my hometown has a rummage sale. I have volunteered at it for the last couple years, mostly because it allows me first dibs at all the vintage stuff that people donate when somebody dies or whatever. Like they have a whole fabric section, and it is sooooo cheap. So this last year, I obtained the below camo:
$2 for like a yard 
Idk if this is actually Realtree or what, but to me it looks like "vintage" camo. Maybe that is just what I wanna tell myself, but to me the image of the trees looks kinda 60s and fabulous. But then again, I am no camo expert. When I bought it, the ladies at the church (most of whom are about 40 years older than me) were like, What are you going to do with that? I was like, Yo, I will make a skirt. They were like, Oh.

Now on the one hand, I used to teach at this high school in rural Missouri and they had a "camo day" during spirit week when the kids could wear camo instead of their uniforms. So they all did. Even the girls. One of my students there killed a couple quails for me too. It kinda reminded me of how cats kill mice and bring them to their masters as like a sign of respect or whatever.

But see I grew up in the 90s, when people like TLC and Gwen Stefani were running around in camo crop tops and what not. So camo was actually fashionable in my day, like even among people who weren't from the country and didn't know things about hunting.

Self portrait, 2001. Note the lifelike detail of the armpit hair. 
Anyway I have been sitting on this Craftsy class for literally like 3 years, where you learn how to make a throw pillow and a skirt. It is called Sewing Studio with Diana Rupp, and it accompanies this book, Sew Everything Workshop. Diana Rupp is pretty cool, like she is living the dream, teaching sewing classes in New York and shit. She has an MFA in Creative Writing, just like me. (you can't really do anything with that degree, just fyi)

So I decided to use this camo fabric to make the so-called "Naughty Secretary Skirt."
But then I was like, Man, I look bad in pencil skirts. 

Yeah, no.
I mean, I could've shortened it, but still.

So I decided a mini was more my style. 
This is the back of the skirt I ultimately made.
This is not double-fold bias tape. Idk wtf it is. I bought it by accident.
Be careful to actually buy the correct supplies.
Fortunately my mom had a stash of double-fold bias tape.
Also it is invisible in this pattern so it doesn't
really matter what color you have.

That is basically the top part of the "Naughty Secretary Skirt" (yo that name is so problematic but I won't even go there), but if you follow the pattern it would obviously be longer and have a slit in the back. 

But yeah there are a couple pleats in the top, an invisible zipper, and the waistband is finished with double-fold bias tape. It is a pretty nifty method for making a skirt, really. Like honestly if I just wanted to make myself a mini, I'd probably use knit fabric and run some elastic through the top because it is a lot easier, BUT I do have a sweet vintage dress (made of woven fabric) in my closet that I have been wanting to cut off into a skirt. I think this method will work nicely. 

This was my Thanksgiving outfit.
That is a Banana Republic sweater, but of course I got it ass cheap from a thrift store.

 I also made the below flower brooch from the leftover fabric, some lace I had, and a vintage earring. I'm pretty sure I got the earring from the annual jewelry sale at the I.D.E.A. Store in Champaign, IL. That is another way to get tons of awesome vintage jewelry for cheap: upcycling stores. I normally get a few things to actually wear and then a few things for crafting supplies. 


The method for making this flower is pretty straightforward. I just cut a 2.5" strip of fabric (idk how long it was, it was just whatever was left over), folded it in half the long way, and then ran a gathering stitch along the raw edge. Then I hand-stitched the lace to the gathered edge... and then coiled everything into a nice flower shape. I secured the flower shape with both stitches and hot glue. Same with the vintage earring. I find if I make fabric or felt flowers exclusively with hot glue, I inevitably get glue on the flower itself and am then filled with regret. But if I just stitch the flower together, eventually it will start coming apart, especially if I wear it a lot, like on a jacket or purse. 


So have you done any "girl camo" projects?? 
Did you wear anything camo in the 90s?
Have you checked out Diana Rupp's Craftsy class or book??

Sunday, June 28, 2015

Barcelona's Parc Güell: Upcycle Tripping

Parc Güell
I arrived in Barcelona on May 18, 2015, and tomorrow I return to the United States. I have spent a total of four weeks here in this whimsical city, as well as two weeks in Madrid and weekends in other places including País Vasco, Sitges, and Sorrento, Italy.

Of course, anyone who visits Barcelona is probably going to see either Parc Güell and/or the Basílica Sagrada Familia, both works of architect Antoni Gaudí (1852-1926). In fact, images of these places are somewhat of a touristic cliché. Really, in general, Barcelona has too much tourism for my liking, although I am lucky to have hung out with some actual Catalan people and to have done some sweet feminist/queer research in addition to touristic activities.


Granted, I don't know anything about architecture, and I know just a little about art history, so my understanding of Parc Güell is basically touristic. BUT, of course, this is a FABRIC blog, so I'm gonna make a connection to sewing eventually here, just be patient.

Anyway, so, Parc Güell is famous for all these mosaics made from broken ceramic tiles, a technique known as trencadís. On the one hand, this allows you to tile undulating surfaces:

broken tile pieces on a wavy bench
On the other, Gaudí was also able to use discarded materials  to adorn the park, which he started building in 1900 as a private housing community.

DUDE, PARC GUELL IS AN UPCYCLING PROJECT!!

Upcycling = adding value to old crap. That is, you take something that somebody else threw away, and you make into something cool. It is fun.

Some of the Parc Güell mosaics are made from broken crockery or bottles, and some from ceramic tiles. Obviously, tiles are all over the Mediterranean. Again, I am not that knowledgeable about architecture, etc., but you can observe the widespread presence of tiles in Spain and Italy, which is less common in the US. For one thing, they are nice and cool in the hot climate.

Check this out-- yo, what does this look like??

A restaurant sign in the Barceloneta neighborhood of Barcelona.
 Oh yeah, A QUILT.

Dude, I saw so many tiles in Southern Europe that look like quilt patterns.

But anyway, more Parc Güell:


According to Wikipedia, this technique also recalls surrealist collages or whatever. So, like, hallucinogens and Dalí. In the end, I think it is awesome how Gaudí took a common element found in Mediterranean architecture (the ceramic tile) and made it into something unique and unexpected. 

Get inspired by this color combo, yo.
Additionally, the design of the park is intended to reflect images and forms from nature:

Delicious starfish
Me making friends with the famous Parc Güell salamander.

So yeah, I just walked around this place and tried to figure out how I could reproduce Gaudí's ideas and style in fabric. Basically, I think if you get some upcycled fabric, cut it up and sew it back together, then it is kinda like that.

Thoughts about Parc Güell/Gaudí? Barcelona? About tiles and quilts?

Sunday, May 3, 2015

DIY Pieced Infinity Scarf with Downton Abbey Prints

I made this pieced infinity scarf  for my sister, using Downton Abbey (and Downton Abbey-esque) fabrics. Here's a tutorial to show you how to make your own.

YOU WILL NEED:
1/4 yard of 7 coordinating fabrics. 

I used 5 coordinating prints and 2 coordinating solids. I recommend selecting these fabrics as though you were selecting prints for a quilt, varying the size of the prints.

Me modelling my sister's Downton Abbey fabric infinity scarf.
So I have been watching Downton Abbey since pretty much the beginning. I heard Maggie Smith wanted to leave the show after next season, and that it is going to be the last one, anyway.
I mean, I can totally understand her decision; the level of activity required for those cast members is probably very taxing even to the young and "able-bodied." The Dowager Countess may just wanna live a more chill lifestyle now.

But anyhow, everybody loves the Downton costumes, so everybody should know about Downton Abbey fabrics by Andover. They have been around for a few years now, and the prints are organized by character, which is cool.


For Christmas of 2013, I made the below infinity scarf for my mom, using a Dowager Countess print (purple), and a Lady Mary (blue). It's quilting cotton, which I purchased at Jackman's Fabrics in St. Louis, MO. This line can be found many places online, or maybe in your local quilt store.

To make my mom's "double-sided" scarf, I basically followed this tutorial:

http://thecottagemama.com/2013/11/cuffed-infinity-scarf-tutorial/

This is a guest post from The Graceful Rose. Anytime I make an infinity scarf, I reference her instructions, except I've never added the cuff and flower that she has there. There are a lot of infinity scarf tutorials floating around Pinterest, etc., but this is the one that has been the clearest and most helpful to me. In fact, I encourage you to refer to her tutorial if mine is unclear. The main reason I am even posting this is to offer a variation on the infinity scarf: the pieced version.

Infinity scarf made in 2013 from two Downton Abbey prints.


At any rate, my sister was like jealous of the scarf I had made for my mom, so I decided to make her one, too. But I didn't feel like just replicating the same thing, so I decided to incorporate more fabrics. The prints I used are all from the Downton Abbey line except for the cream colored fabric with the small black print. That one was from JoAnn, I believe, and I think the solids were from there, too, but I'm not 100% sure because I bought all this fabric like over two years ago (!).

 Anyhow, I cut five 4.4" x 9" blocks from each print.  


  I then laid the blocks out on the floor in an arrangement that I liked. I kinda thought about this like piecing a quilt. Go ahead and take a photo of the blocks, so you remember how you want them. Or you could roll oldschool and write up a schemata, which I also did, but I lost it, so.


 Next step is to piece the rows of blocks together. RS to RS, then press open the seams.


 Then you piece the rows together. I lined them up in this way, making sure that blocks 1 and 2 of the second row were centered against block 1 of the first row, so that the rows would be staggered. 
Sew the rows together, RS to RS. Press the seams.


 After you piece together all the rows, you can cut off the edges and have some nice scraps for another Downton Abbey project... 


The finished scarf piece was 19" x 55.5"


 So, fold that in half, RS to RS, long sides together.


 Sew around all the edges, except one short edge. 
Also, leave like a 6" opening in one of the long edges.


Reach in the open end and pull the scarf through.


But not all the way through. This is looking through the open end. Make sure the scarf is not twisted. (Note: see the Graceful Rose link above for a better explanation of this process).


I forgot to take a pic, but you will then sew along that open end. 
Then, reach through the 6" opening you left and pull the scarf right side out.


 You can ladder stitch that shut. I was totally drinking alcohol while I did that. 


FINISHED SCARF. GIVE IT TO YOUR SISTER. 
Or else keep that shit for yourself.

A couple tips for this project: 
-Make the scarf from prints that you want to wear. That is to say, of course there are prints I would looove to use for a quilt, but I don't want to walk around with them on my body. So, like, don't put them in a scarf. 

-To be honest, quilting cotton might not be the best choice for an infinity scarf, because it is rather heavy/bulky and wrinkles easily. If you want Downton Abbey prints, then you are stuck with quilting cotton, which will totally work. But if you are looking for different prints, you might consider some apparel fabric. Like even knits, if you are patient enough to deal with them.


Please post pics if you make your own pieced infinity scarf!! I would also love to see pics of anything you have made with Downton Abbey fabric.